
Happy Saturday to you! Today I'm sharing a felt bow tutorial.. I love making these from leftover felt, it's easy and fun and cute! Yay!

Things needed:
- Felt
- Glue Gun
- Scissors

Cut your felt into rectangle squares. Mine are about 5 x 7 cm, but you can go as big as you'll like!
Tip: As an easy template, you can use a business card!
Also cut out thin strips for the center of the bow (one strip for each rectangle).
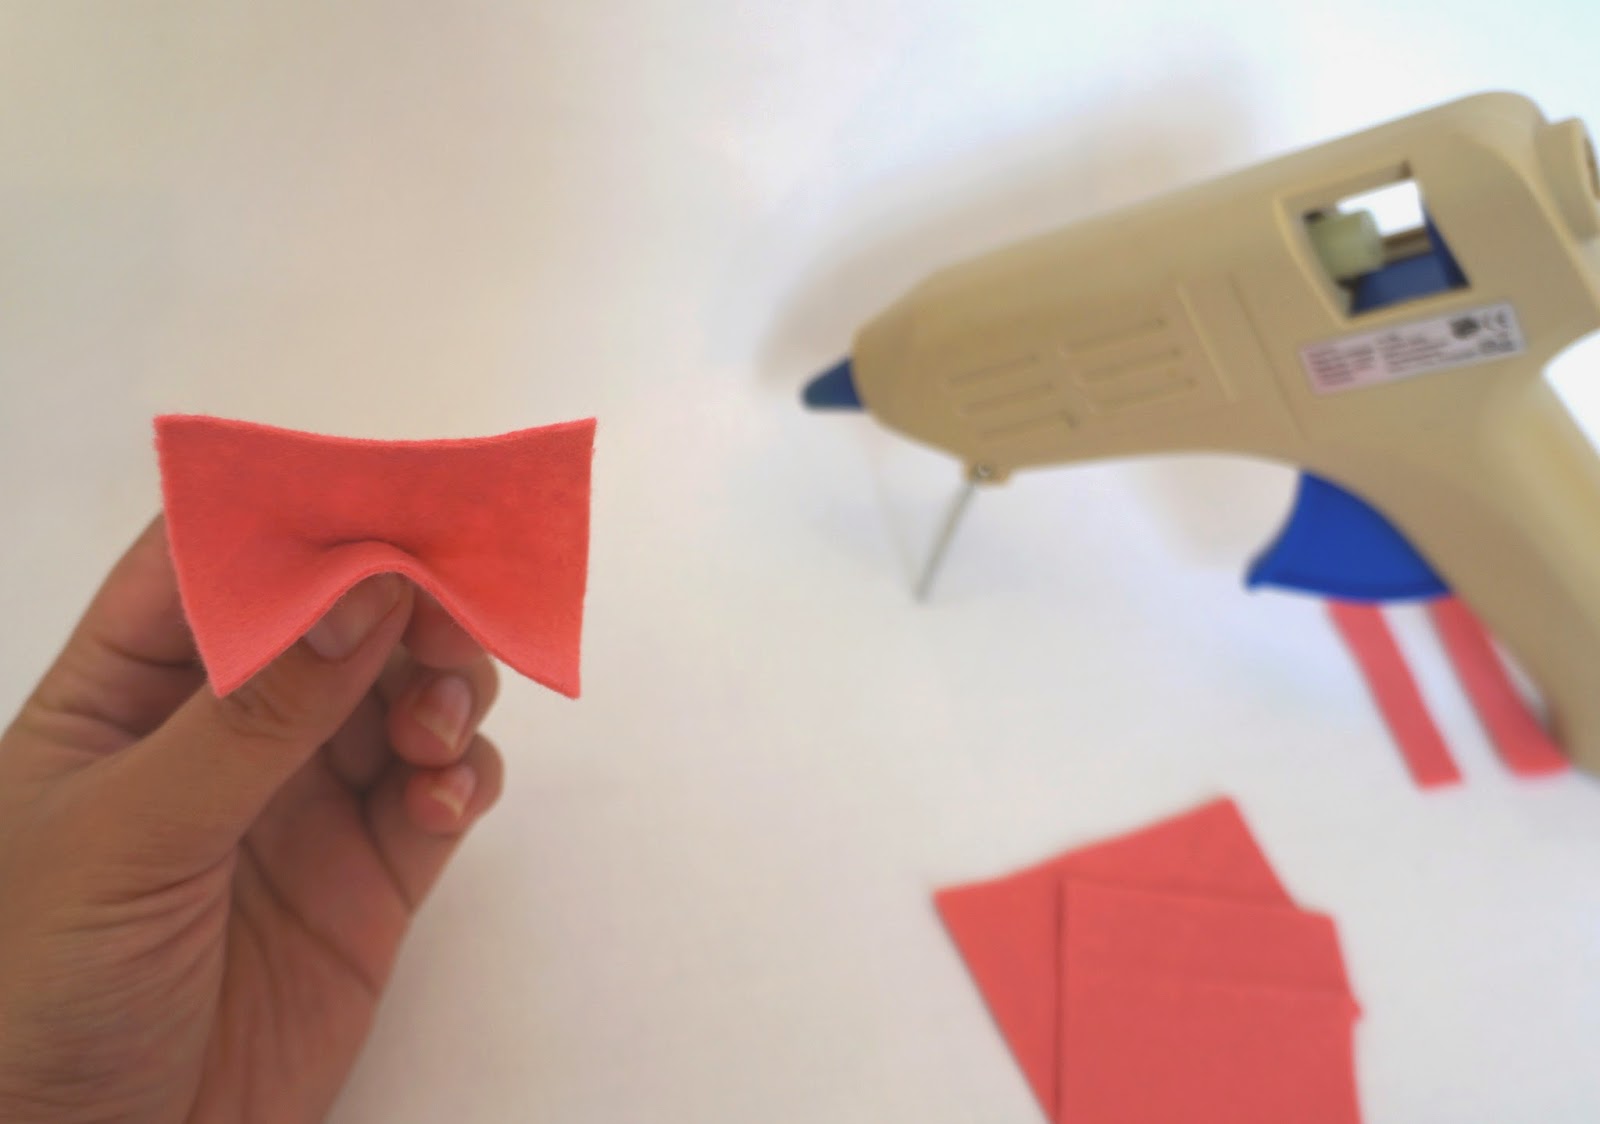
Pinch the middle section of the rectangle, the sides should fold your way) and glue together.

Turn the rectangle over and now fold the sides over (again, the sides should fold your way) and glue together. This always makes me think of an accordion!

Now add a dollop of glue to the back and press one end of the small center strip to the bow. Wrap it around the bow and secure with another dollop of glue, at the back of the bow.

Cut off the remainder of the strip. I like to also cut the corners of the bow, making it just a little bit softer..

Now make a bunch!

Told you it's easy right? I made a garland, and also glued some on the back of paperclips, as cute markers for my planner! What would you make with them?


I always smile when I read your posts. I feel you are always in a happy-go-lucky mood. Crafting is fun with you.
ReplyDeleteThese are SO cute - I love them ! Especially the string of bows - just gorgeous.
ReplyDeleteKate x